|
I used to display my hippie headbands by hanging them on some small twirly thing that looked unorganized and messy. My customers were just not really noticing them much so I decided that I needed a way to display them in a way that would showcase them better. I headed to Goodwill and began to shop around for anything that was round and wide enough that I could slide the headbands on it without them falling off. I came across this toilet paper roll holder and thought I'd give it a try. It was the perfect shape but much too slick to keep them from slipping right off so I continued to shop around to find something to cover it with. Besides...I needed to find something to make it look cute too! :) 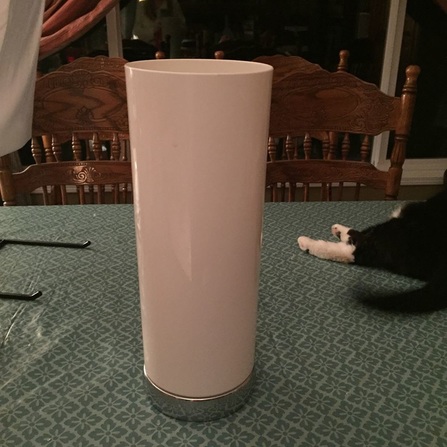 I came across a perfect sized valance that was already finished so all I had to do was cut it to fit around the holder, sew a straight stitch down the cut side and slip it on. That was it! I did add buttons on the back side to hold up the loose headbands but most of them stay on with no problem at all. It was also the perfect colors too!  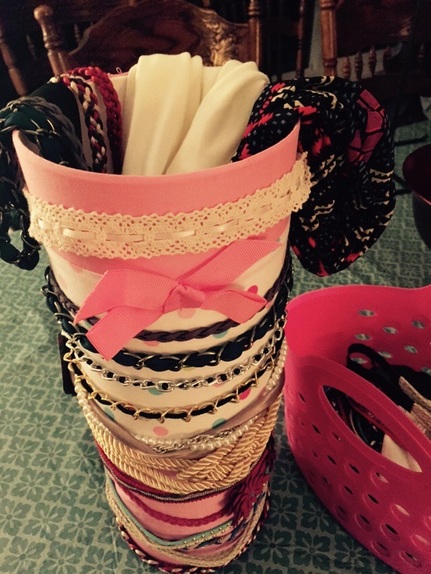 I'd like to find some kind of pedestal for it so I can have it sit up higher on the table but it looks so much better than what I had before! I can also store my headbands inside the holder for transporting. When I set it up on my table, I use the headband holder to display one of each headband and I put all of the extra headbands in a basket next to it. 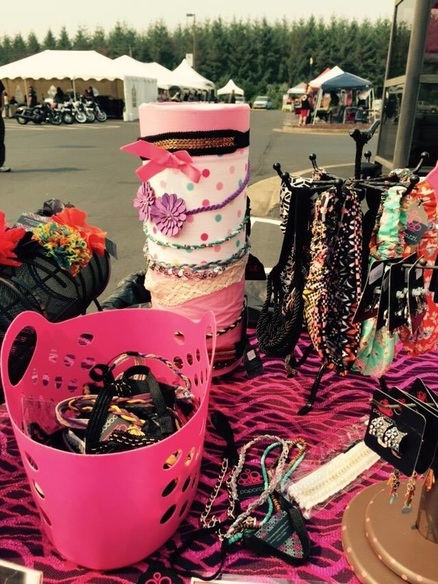 Well...I'd say it is kitty approved! Lol! 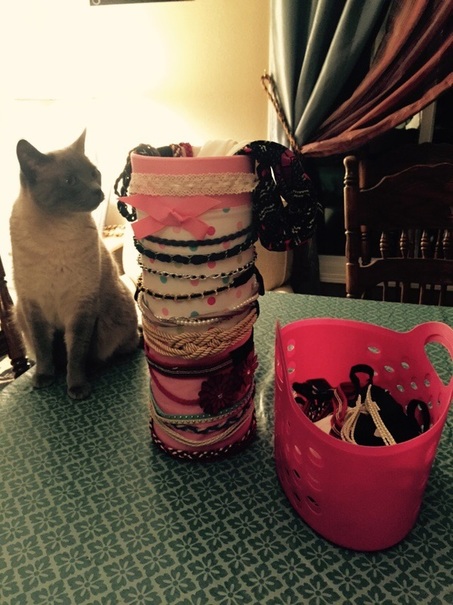
0 Comments
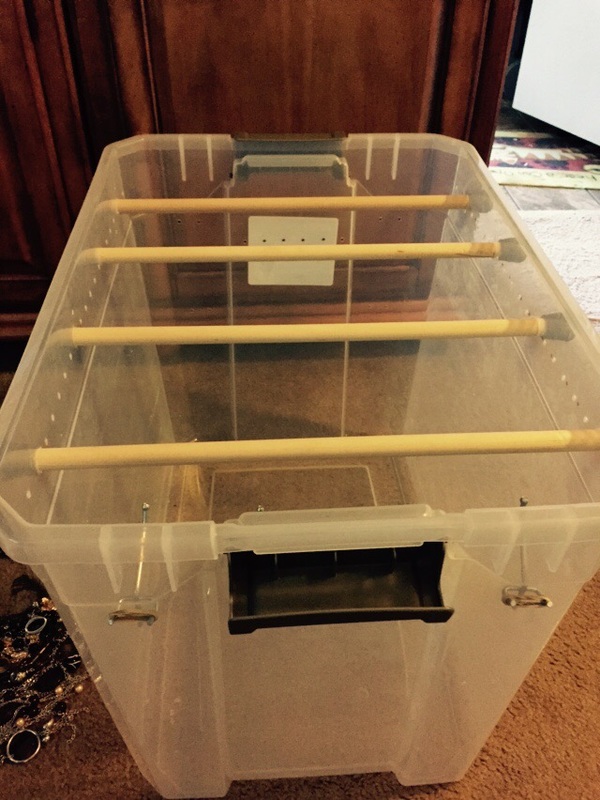
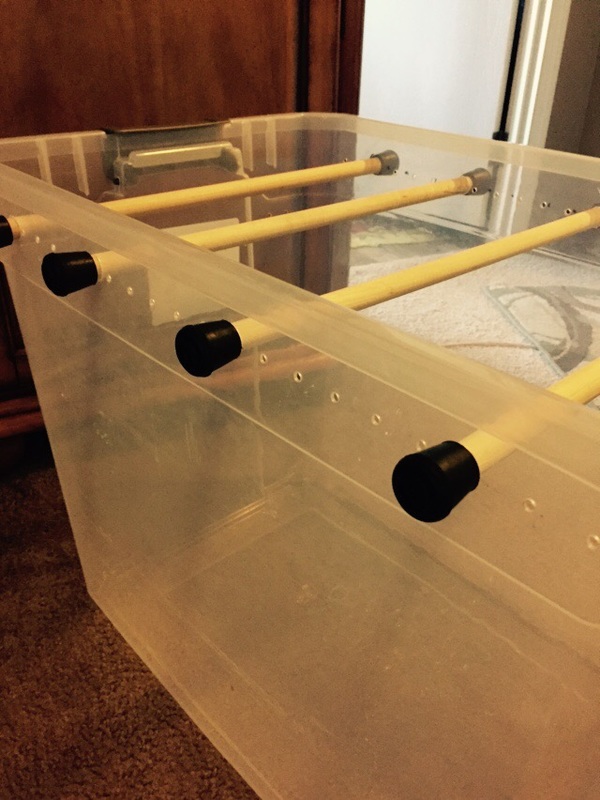
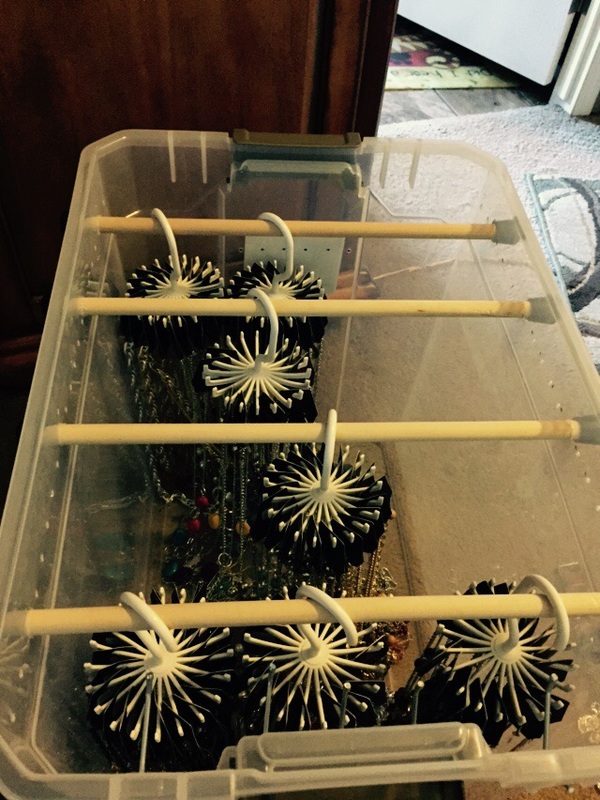
Twirl-a-ties work great for my extra inventory and it also creates a different look to my booth space. Some people really like to shop from these cool little gadgets and it is a nice change from the large, overpowering pegboard displays. This display is open and airy and allows more light into my booth than my HUGE pegboards. Imagine how dark and closed off my booth would be if I used those large pegboard displays on both sides of the booth! I love the openness and the look of the twirl-a-tie display! Now the questions is, how do I transport so many twirl-a-ties to my events? Many people use oatmeal containers and those work great! However...when you have as many as I do, the oatmeal containers can take up way too much space. I currently have around 20 of them and that is a LOT of oatmeal containers! We don't eat that much oatmeal! Lol! Anyway, I needed to find a better way to transport a large amount of them that took up less space. I saw this idea on Pinterest and decided to make one myself. Here's what you need: What you need:
Instructions:
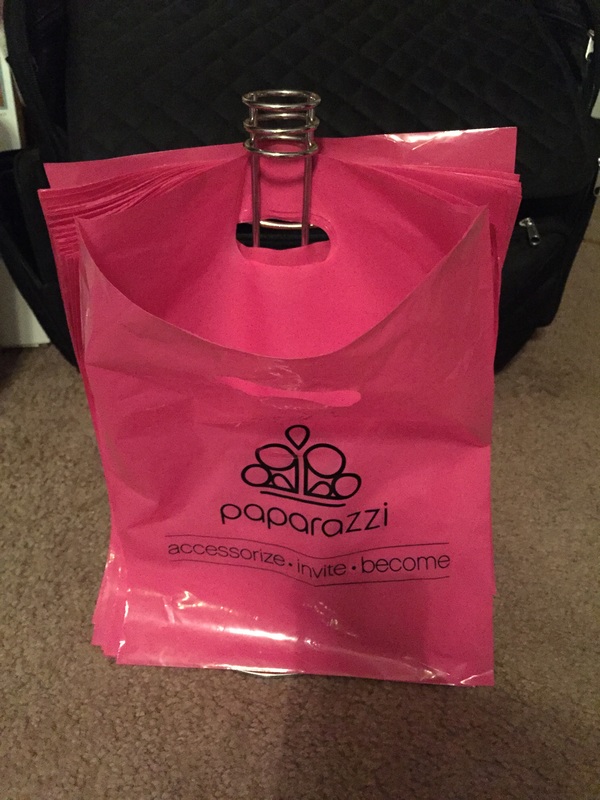
   During an event or home party, checking out my customers can get pretty busy (which is a great thing!). I needed something to speed up the process and make it easier for me to bag all of their purchases in a timely manner. I also wanted to make sure to include party and recruitment information as well as a business card so as I was bagging their purchases, I was also stuffing all those handouts into the bags! Sending a customer home with your business information is a great way to get your information out there and hopefully keep your customer coming back so I started pre-stuffing my bags before my events. I actually just stuff them as I watch TV at night. I even get my Husband to help sometimes! :) Now that my bags were stuffed and ready to go, I needed a way to keep them from sliding all over my table as I was trying to slide the jewelry in them. Those bags are slippery little boogers! I used to keep them in a box, and that did work ok, but I found something that worked even better! This little bag holder allows me to keep the bag upright as I add the jewelry to it. It works great! It takes up less room on my checkout table and is so much easier to use too! I don't remember what this item began it's life as, but it is now re-purposed as my little Paparazzi bag holder. :)
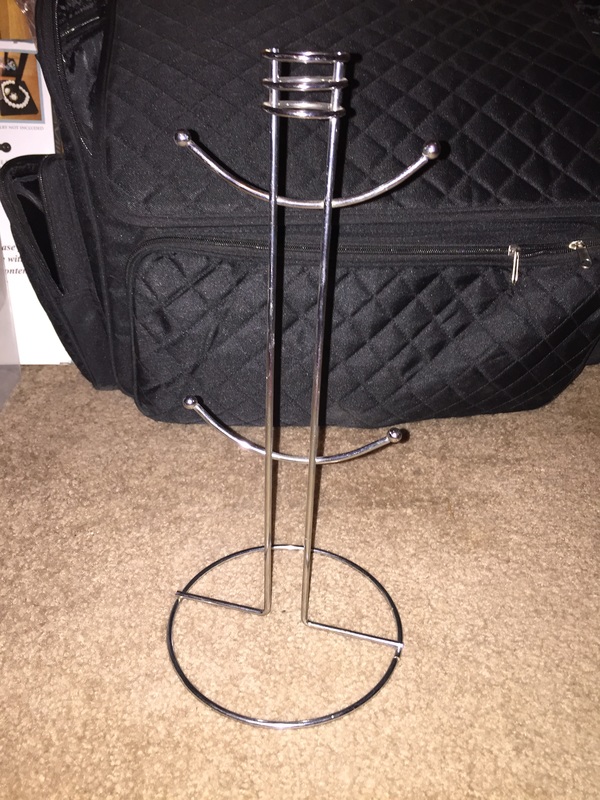
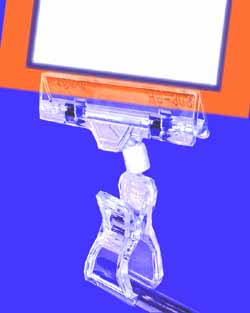
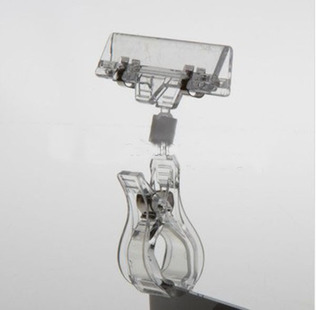
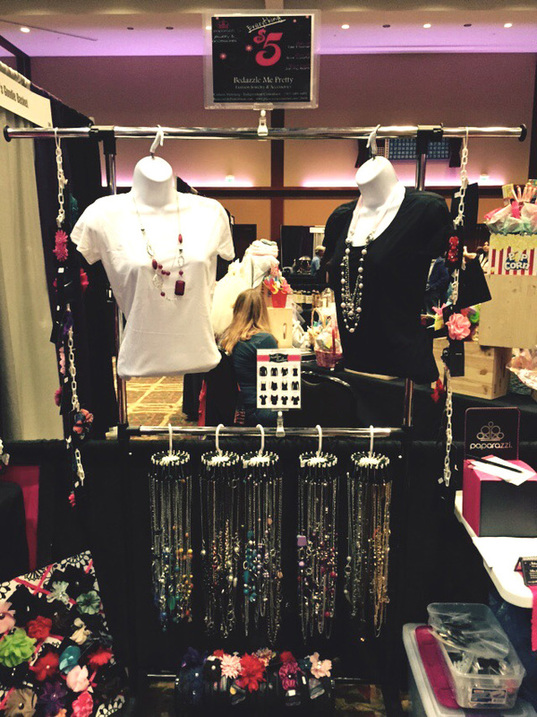
I don't know about you but I have struggled to find sign holders for my Paparazzi displays that work with my big pegboard displays. I use garment racks to display my jewelry because I have a large inventory and they hold a lot of stuff. However, using ROUND garment racks really posed a problem for hanging signs. Tape didn't hold at all and many clip on sign holders were square shaped so I did some shopping around and finally found the perfect product!
These little clip-on holders are made to clip to a round shaped item, which fits perfectly around the bar of the garment rack. They have a small acrylic piece that your sign slides into to hold it up. Now, for obvious reasons, it won't work with just a paper sign, so you will need to either print your sign on card stock or other thicker, sturdier paper or do as I did and laminate your paper signs, otherwise they will just flop over. I would recommend laminating because they will last a very long time this way. Especially if you are constantly re-using them, putting them up, taking them down, packing them away. They can really take a beating if not protected and having them laminated does that perfectly! Another really cool feature about these sign holders is that they swivel so you can clip them to just about anything and adjust them to hold your signs up straight. Pretty cool!
I found them online at www.specialtystoreservies.com. They were only a couple of dollars each and well worth the investment! I bought 12 of them because not only do they hold your signs on top of your rack, but they can be clipped to just about anything...including your shopping baskets, hair clip baskets, headband displays, and more! Just print some small signs to label your smaller displays and clip them right to it!
|
AuthorMy name is Colleen Menning and I have been a Paparazzi Independent Consultant since September 2014. I hope that some of these posts inspire you to build your business and learn from what I have learned through trial & error. Archives
November 2015
Categories |


 RSS Feed
